Original Story posted on: bobvila.com
Written by: Glenda Taylor
Before you start tearing apart your kitchen sink area to swap in a new, more stylish faucet, get to know the process and any obstacles that might slow you down.
Has your old kitchen faucet seen better days? Whether yours is leaking water or is simply outdated, replacing a kitchen faucet is among the most popular do-it-yourself projects in the grand scheme of a full kitchen renovation.
Unfortunately, it’s not always as simple as it sounds, swapping out an old chrome faucet for one with a trendy brushed nickel finish. The entire replacement task might go without a hitch, but because faucet configuration (and under-sink conditions) vary, chances are you’ll run into a snag or two during the process. By knowing what to expect—and what could potentially go wrong—you can avoid common pitfalls and recognize when it’s time to throw in the towel and call a plumber. Here, we’ve outlined six necessary considerations before you get started on a kitchen faucet replacement.
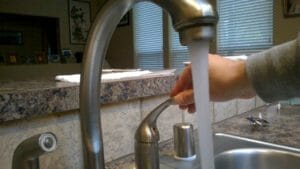
1. Always shut off the water before replacing a kitchen faucet.
Before the work can start in earnest, you’ll have to shut off the water to the existing faucet. Most of the time this is a cinch, accomplished by simply twisting On/Off valves located on the hot and cold water supply lines (connected to the underside of the faucet) to “OFF,” using just your fingers.
If your existing faucet is at least a few years old, it’s not unusual for the valves to be stuck or rusted, making them virtually impossible to budge. Applying heat to the valve with a hair dryer will often loosen the valve enough that you can close it. Alternately, use locking pliers to grab the valve and gently coax it to the Off position. Be aware, however, that excess twisting pressure could break the valve and/or the supply line, which will result in water shooting out and flooding the cabinet. For this reason, before you attempt to loosen a stuck shutoff valve, it’s a good idea to shut off your home’s main water valve (often located inside a basement or crawlspace where the water line enters the house).
If you can’t locate the main valve, you can always use pliers to turn off the water at the meter (located in your yard beneath a small manhole-like cover).
2. Removing the old faucet is often trickier than it sounds.
Once the water is off, removing the old faucet is a matter of loosening the nuts that hold it in place (from beneath the sink) and then lifting the faucet out of the holes. Unfortunately, this step can be easier said than done. The space under the sink where the faucet attaches is often narrow and, due to its location, pitch black. You’ll need a strong work light to illuminate the area and an adjustable wrench to loosen the nuts.
Like the shutoff valves, the nuts holding the faucet in place can be stuck or rusted. If you run into this problem, try brushing away as much corrosion as possible with a wire brush and then spraying penetration oil, such as Liquid Wrench (available from Amazon), on the nuts to help dissolve the corrosion. It can take from 30 minutes to overnight for the oil to work. If you try loosening the nuts again with the wrench and they still won’t turn, they will have to be cut off with a reciprocating saw or a hacksaw. Some do-it-yourselfers opt to call a plumber at this point.
3. Spare your aching back with the help of scrap plywood.
Of all the repair projects you can undertake around your home—even the ones such as painting baseboards where you have to bend and stoop or cleaning out gutters where you have to climb and stretch—few of them are as uncomfortable as trying to wiggle into the confined space under a kitchen sink. In addition to crawling into the cabinet to see where the faucet attaches to the countertop, you’re also lying across an uneven surface: The inside floor of the cabinet is generally a few inches higher than the kitchen floor, so your back has to contort to the difference, which never feels good.
A little trick to ease the discomfort is to insert a small sheet of plywood inside the cabinet. The sheet should be narrow enough to fit through the door’s opening, but wide enough to lay on and long enough to support your back and rear end. Use six to eight quart-size cans of paint (or cans of similar size) to support the end of the plywood sheet that extends out into the kitchen—that should give you a flat surface on which to lie as you replace the faucet.
4. Know your limits.
Sometimes, you simply can’t wedge your body far enough beneath the sink to have a clear path to reach the nuts holding the old faucet in place. When it looks like you’ll have to remove additional plumbing like the sink drain trap or the garbage disposal, what should be a two-hour faucet-replacement job can quickly turn into an entire weekend plumbing project. If you don’t have plumbing experience, it’s often better to call a plumber rather than attempting to remove and then reinstall additional plumbing elements.
5. Choose the correct replacement faucet.
Before you head to the home improvement center to buy a faucet based simply on its shape and finish, get to know your current sink hardware. The best way to do so is by removing it: With the old faucet removed, you can make note of the number of holes in the sink and the distance between the center of left-most hole to the center of the hole on the far right. This is known as measuring “on center (OC)” and is the industry standard for measuring sinks’ holes. The actual diameter of the holes doesn’t matter. Installation of the replacement faucet will go the smoothest when you select one that fits the same hole configuration. Plus, with the old faucet removed, you can even take it with you to ensure that you get an exact match.
A typical, two-handle kitchen faucet installs over a set of three holes, with the two outside holes being eight inches apart. Updating to a stylish single-handle faucet that requires only one hole to install when you have three is still possible. For this, you’d need to purchase a separate base plate, called an “escutcheon plate,” that matches the finish of the new faucet and extends long enough to cover up the unused holes.
The reverse situation occurs when you want to go from one handle to two, necessitating two additional holes. In this case, you can bore additional holes in the sink (or in the countertop behind, depending on your existing faucet configuration) to accommodate the new faucet. Note that this moves the project out of the do-it-yourself category, though: Boring new holes in a granite or quartz sink or countertop should be done by a countertop contractor who has the equipment to bore the new holes cleanly without cracking the countertop material.
6. Bring in a pro for wall-mounting a faucet.
Faucets that attach directly to the wall behind the sink are the newest and trendiest faucets around, appealing to those who want Old World appeal as well as those who are looking to create a semi-pro chef’s kitchen by installing a wall-mount faucet with a rotating and extending faucet arm. Unfortunately, this is one of the most involved replacements a homeowner can ask for. Making the switch from a sink-mounted (or countertop-mounted) faucet to a wall-mounted faucet involves opening up the wall behind the sink and running new water-supply lines—definitely a job for a plumber. Not to mention, you’ll probably want to replace your old sink or countertop to get rid of the faucet holes left behind.
View original article here.
